DIY Laminate Countertops

*This post may contain affiliate links – my full disclosure statement is available here
Last year we started transforming our shop into an entertainment/guest house and we did the majority of the work ourselves. Since then, we’ve decided that some things are better left to the pros, but laminate countertops aren’t one of them.
Since the property will ultimately become a rental, we ended up choosing Formica. Laminate has come a long way and is a great option if you’re looking to cut some cost – it comes in a ton of different finishes and is scratch, stain, and impact resistant.
Not going to lie, the thought of DIYing laminate countertops was super intimidating at first, but it was surprisingly easier than anticipated. We will definitely be using Formica again in future rentals.
Materials & Cost Breakdown
- Table saw or circular saw
- Jigsaw w/ fine tooth blade
- Router w/ flush laminate trimmer bit (1 @ 18.97)
- 3/4 MDF sheets for your base (4 @ $31.95)
- 4×8 laminate sheets (we used these) (2 @ $59.99)
- Dowels (8 @ $1.77)
- Contact cement or laminate adhesive (1 @ $14.48)
- Metal file (1 @ $8.38)
- Liquid nails
- Screws
- TOTAL: $304.19
We figure we saved ourselves about $600-$800 DIYing this job as the average for custom laminate countertop installation is between $791 and $1,621 or $40-80 per linear foot.

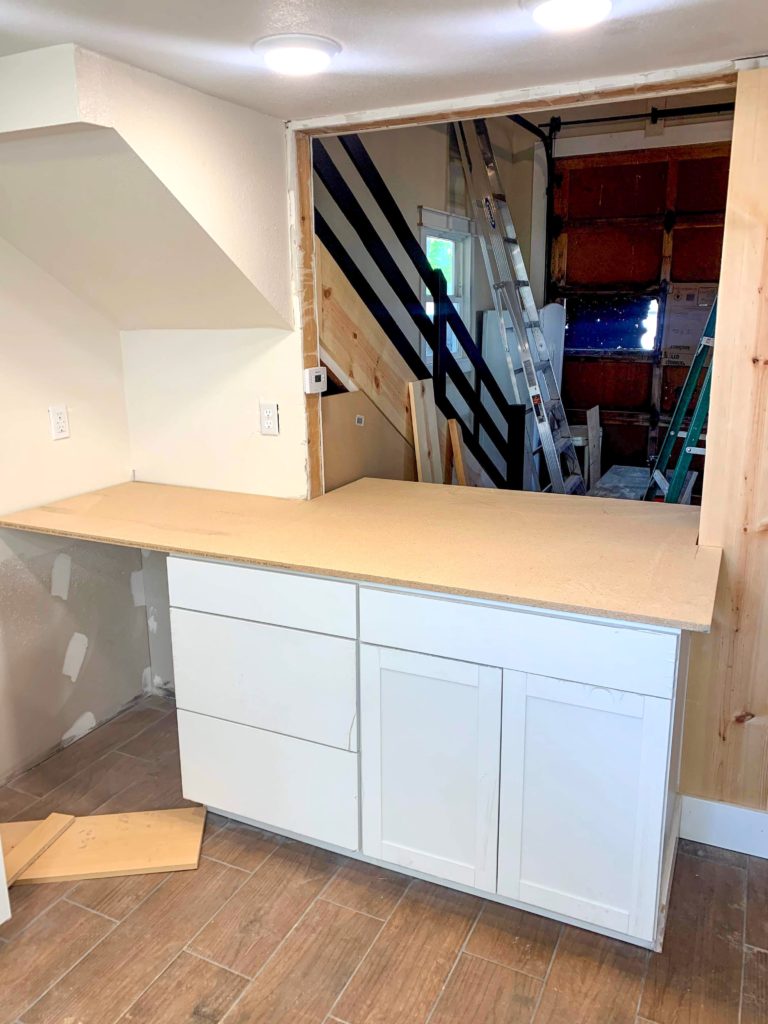
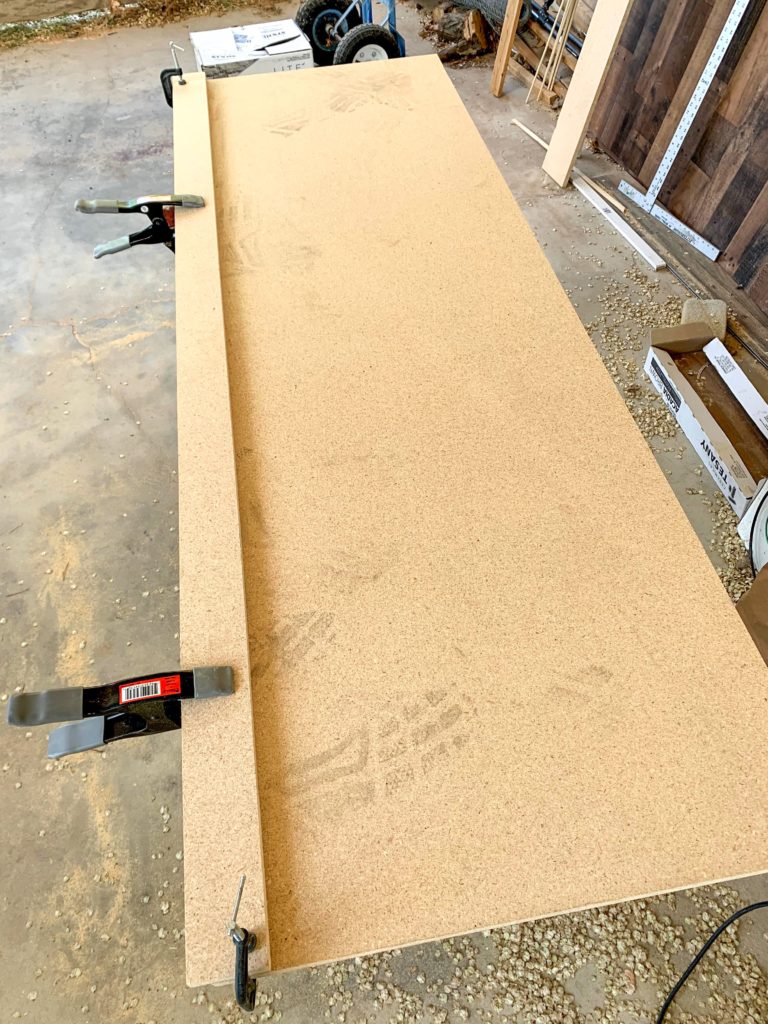
1. Start by building your base
We built our countertop bases by using 3/4″ MDF sheets from our local hardware store. Before you start measuring you’ll want to decide how far you want the countertop to hang over the edge of the cabinet and the overall thickness.
You’ll want a 1″ overhang at a minimum and a thickness of 1.25-1.5″
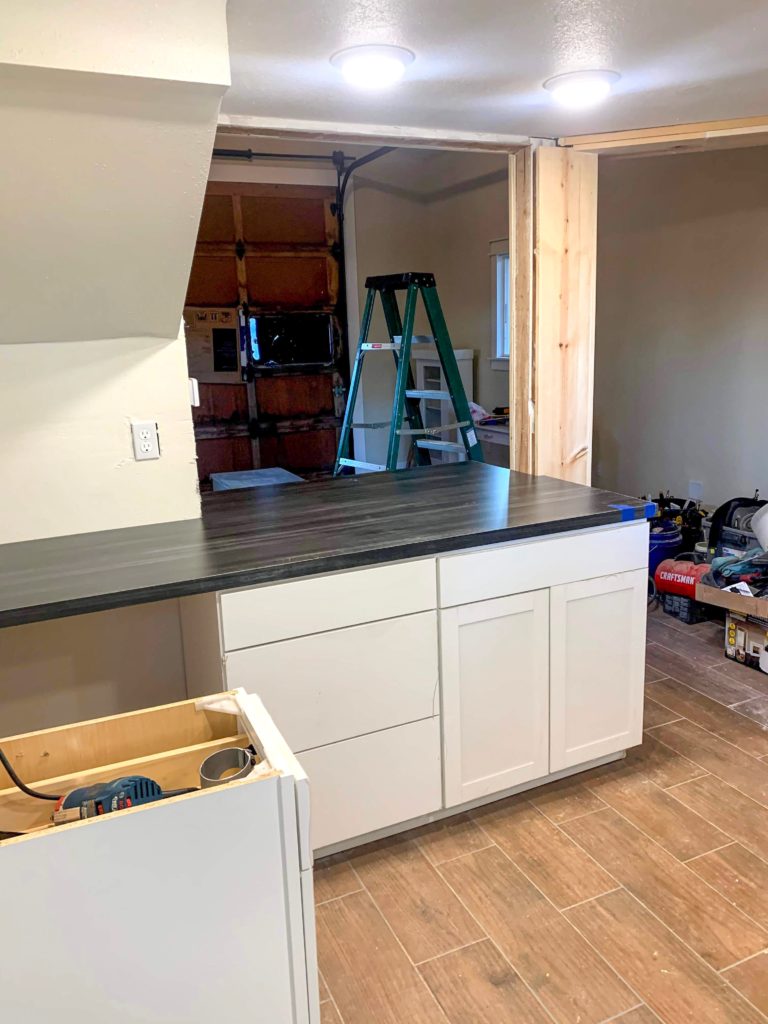
If you are doing a breakfast bar pass-through like we did below – your eating area will need to have a 12″-15″ overhang (the taller the bar, the less space you need as knees will bend less on taller stools).
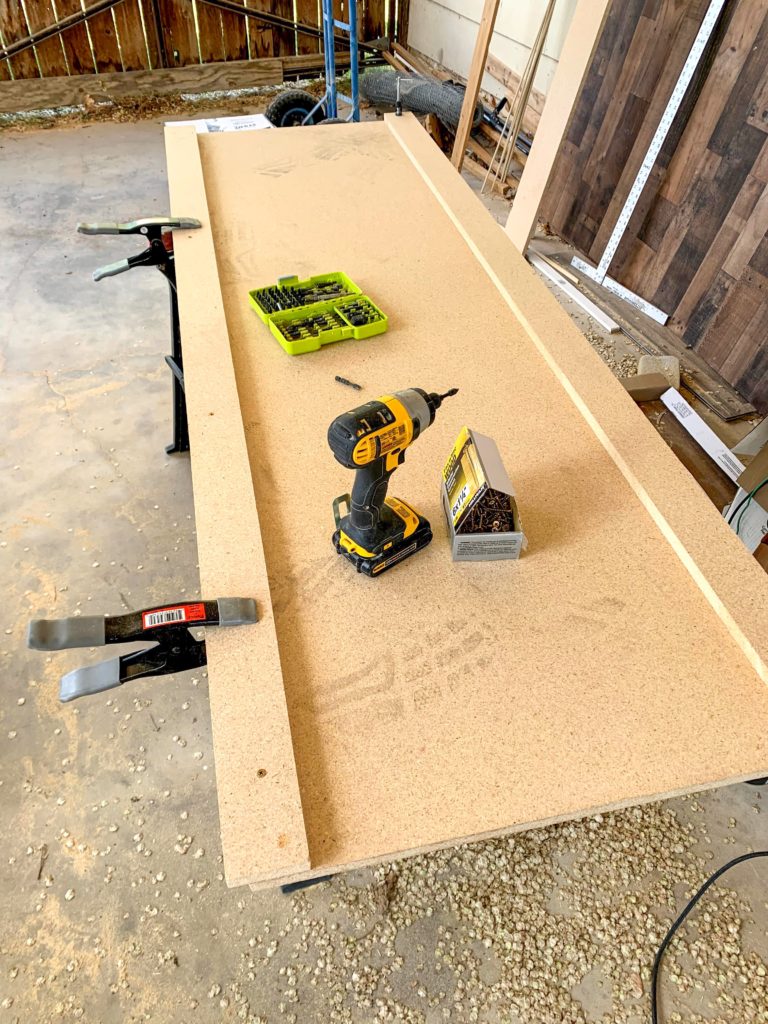
To get your desired countertop thickness you have two options 1) Double up your MDF or 2) add a strip of edging around the bottom perimeter of the countertop.
We ended up doing both – doubled up on the breakfast bar piece for more stability and a bottom border on the sink side so that we didn’t have to cut a hole through two layers of MDF.
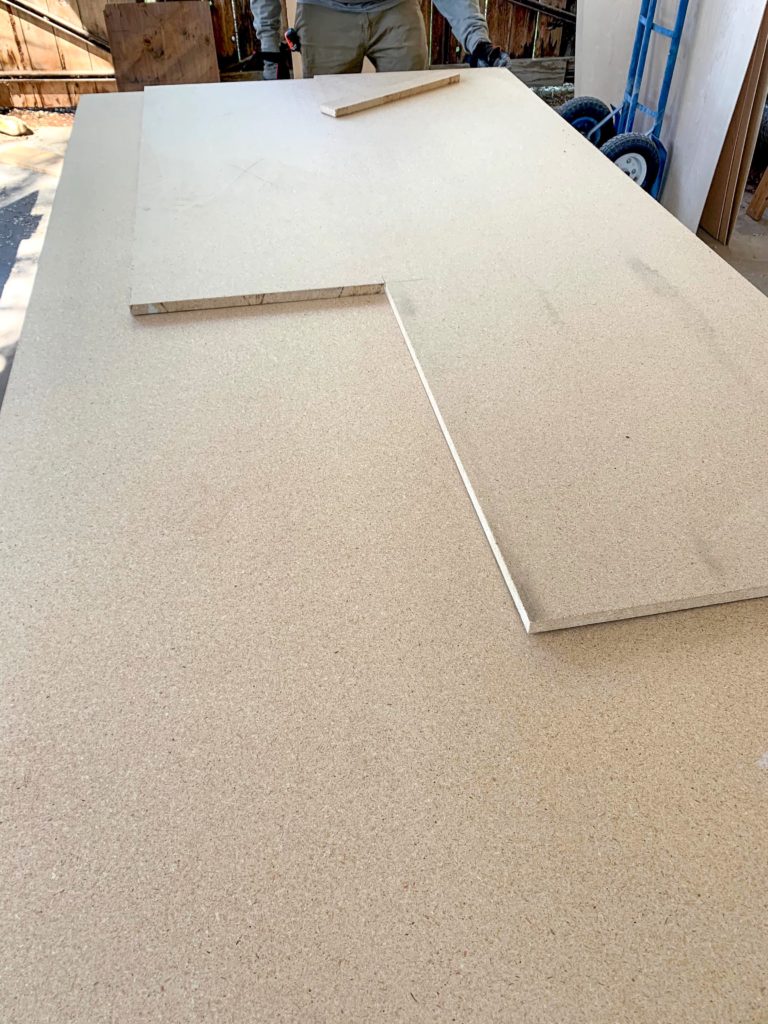
On the doubled up piece, we used liquid nails and screws to glue them together. I highly suggest that you cut and dry fit your countertop bases before you do this – the pieces will fit tighter as you increase the thickness.
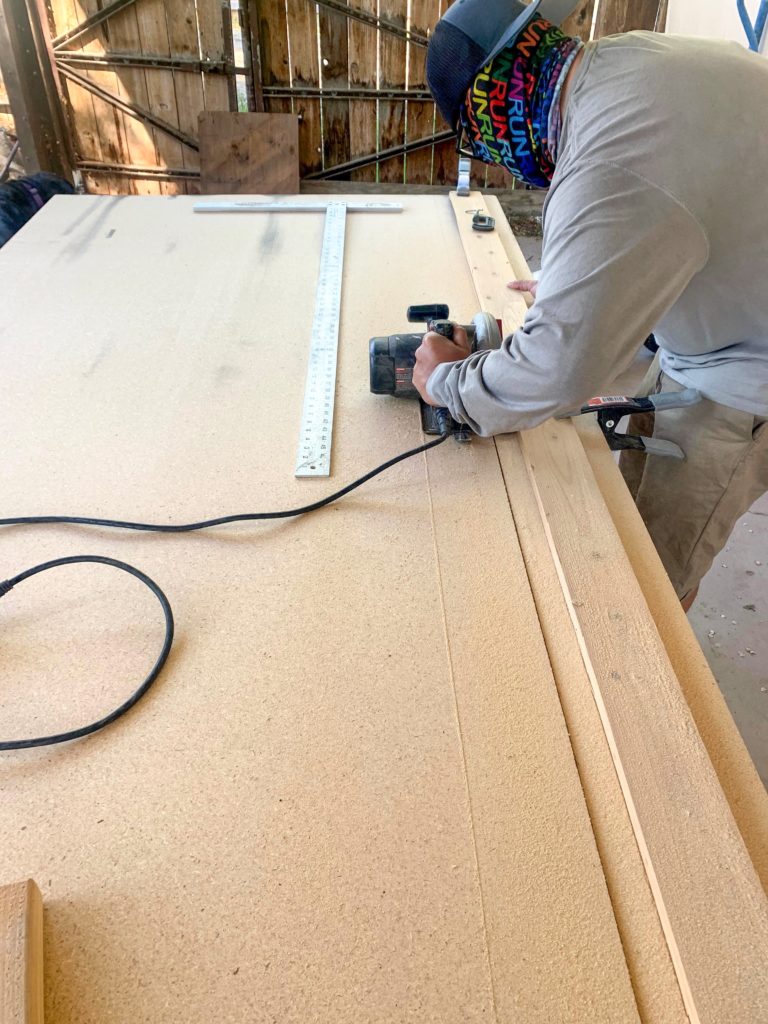
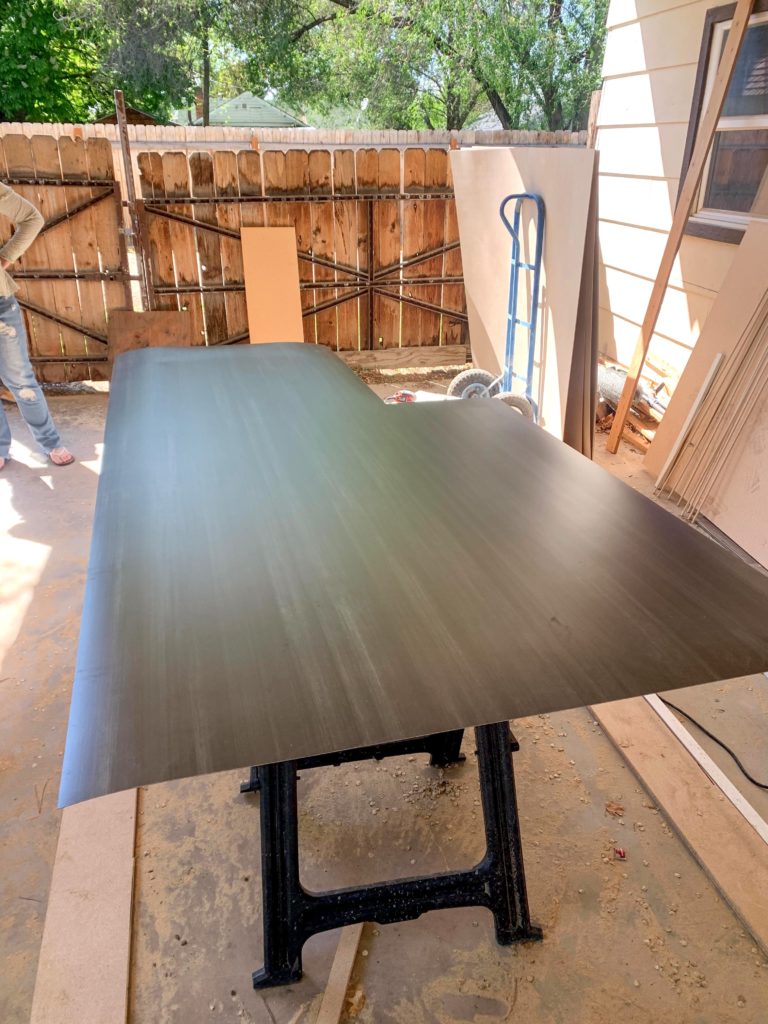
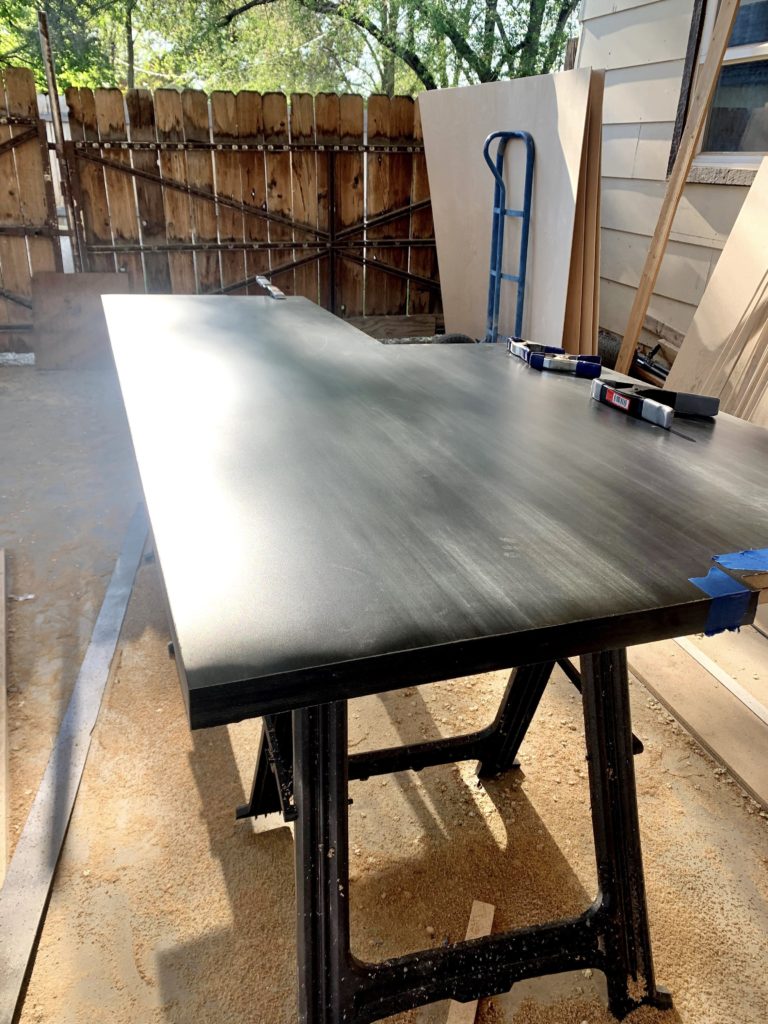
2. Pre-cut the laminate sheets
Once your base is ready, pre-cut the top and edge strips. We used a jigsaw with a fine-tooth blade making sure to cut the laminate at least 1/2″ – 1″ longer/wider than we needed so we had enough coverage. Don’t panic, the edges will be rough, but they will be trimmed all pretty like later with the router to bit.
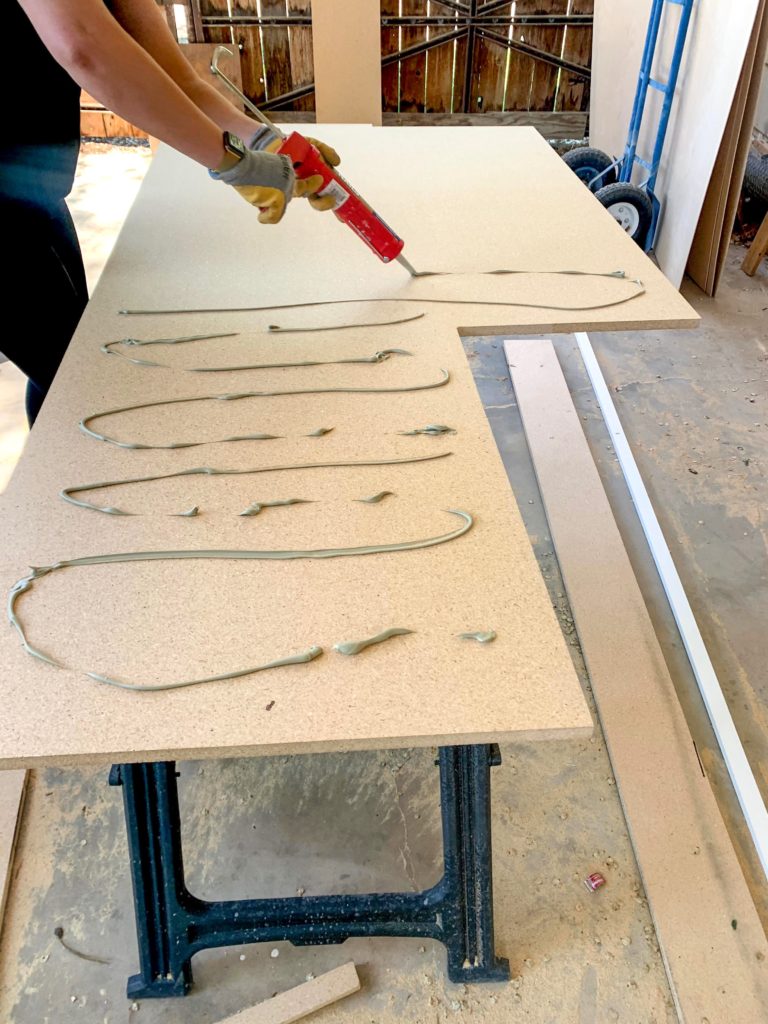
3. Glue your edge strips
Alright, so this is a do what I say not as I do deal. Glue your edge strips down first! We made the mistake of gluing the top down first and the edges are not as clean as we would like because of it.
Using a small roller, coat the underside of your edge strips and the MDF really well with cement glue. Let them sit for a few minutes until they get slightly tacky, then press them down on the edges. Put pressure on them as needed until the glue sets up and they are no longer able to lift.
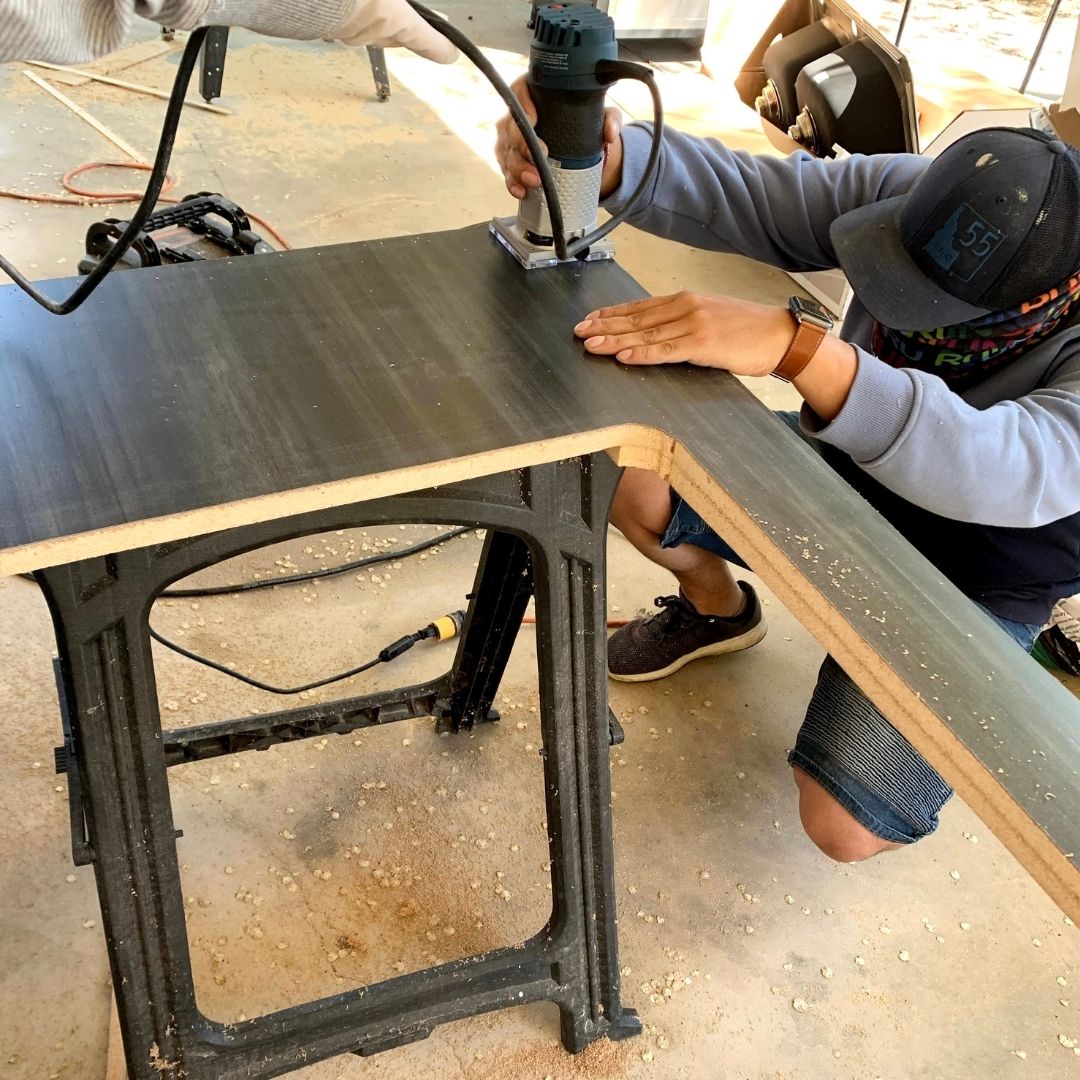
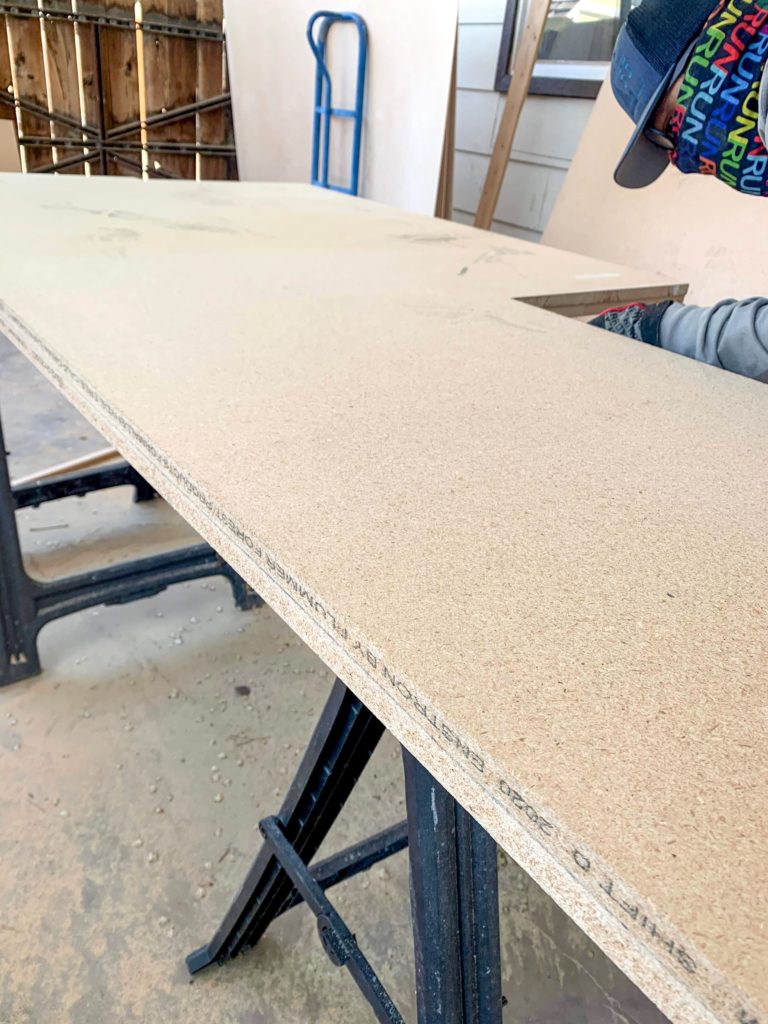
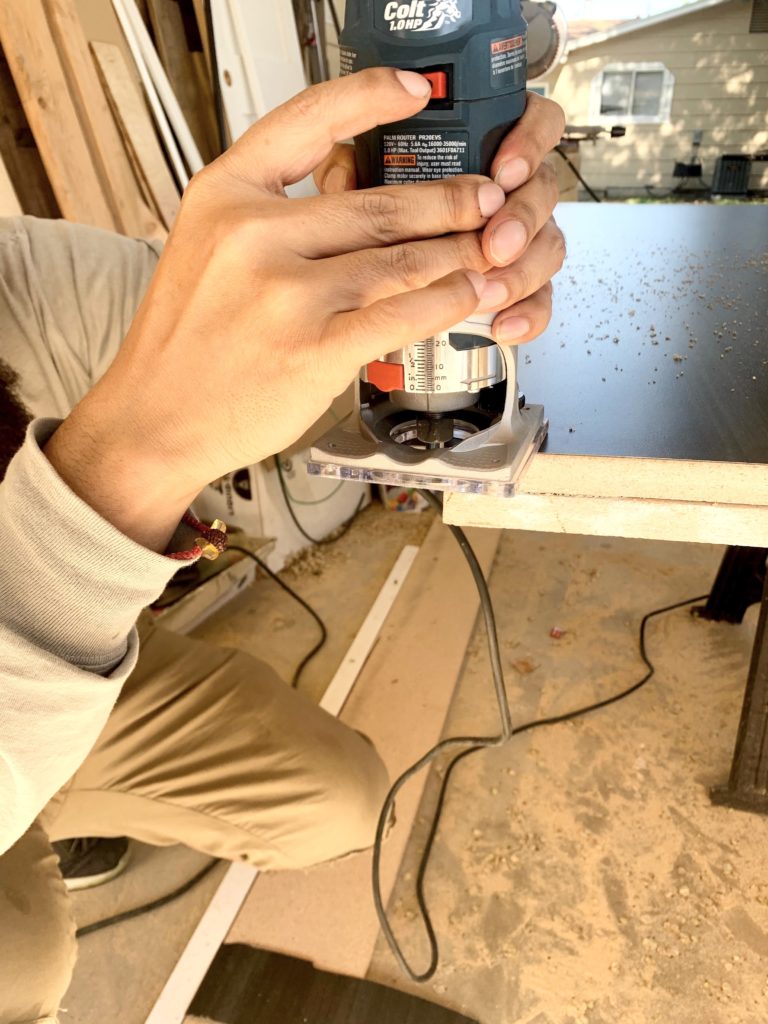
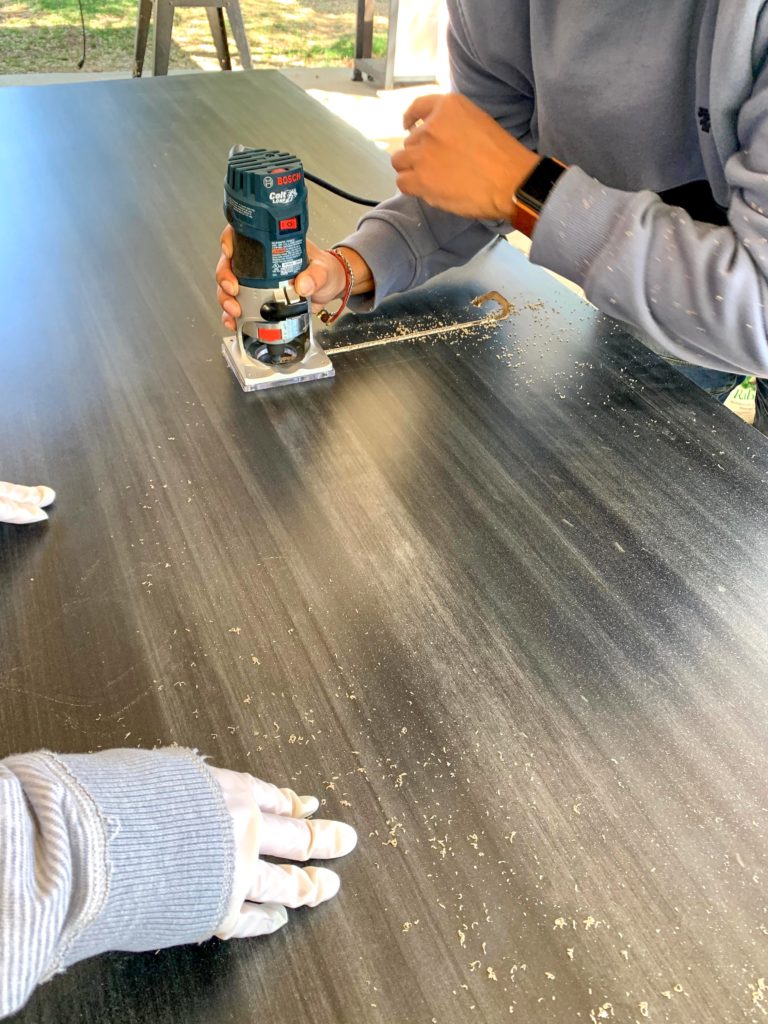
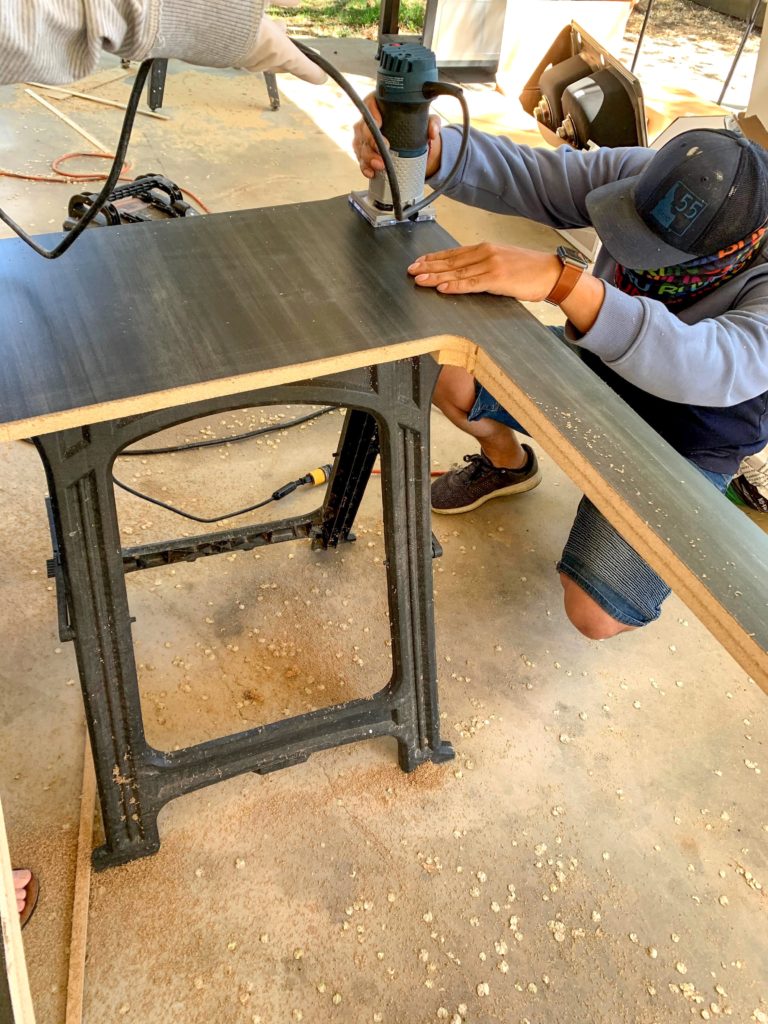
4. Trim the excess laminate
This is where you are going to want to practice before you go all gung-ho on your hard work. We ended up taking a few scraps of laminate and glued them to spare boards so we could test out the router bit. After sorting out some minor anxiety we started trimming.
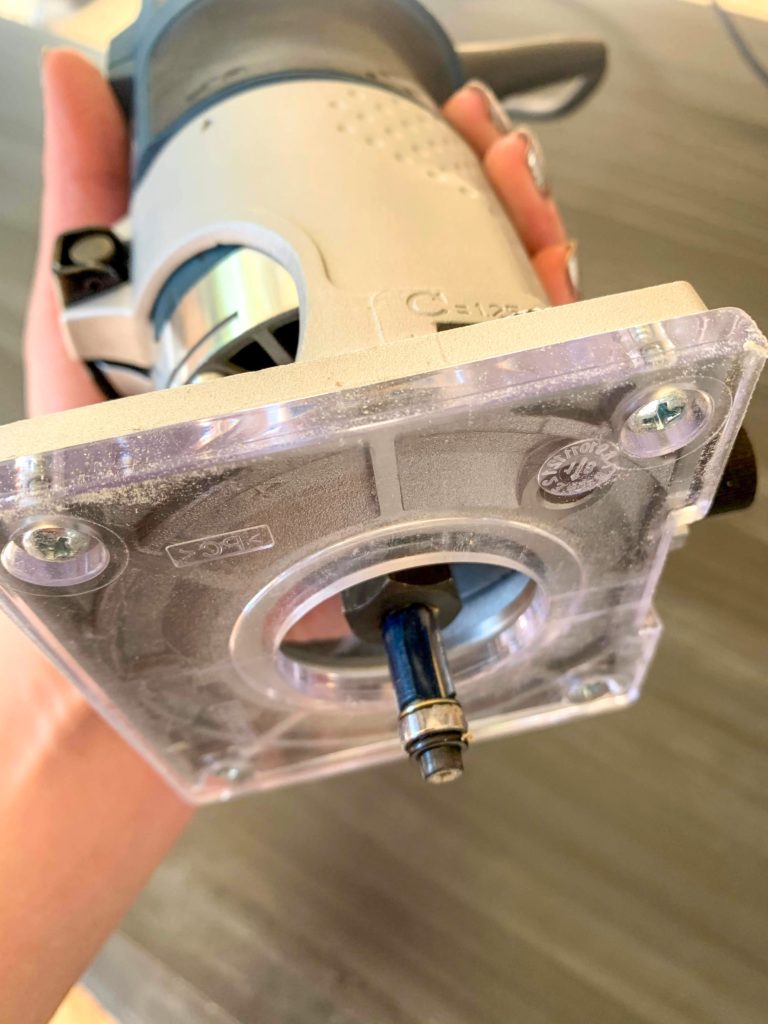
Once you are comfortable with the bit, go ahead and start trimming the edges (again, let’s pretend that we did the edges first). The most important part here is to stay level and move slow. You can use a metal file to sand down any rough edges later.
5. Glue your top piece
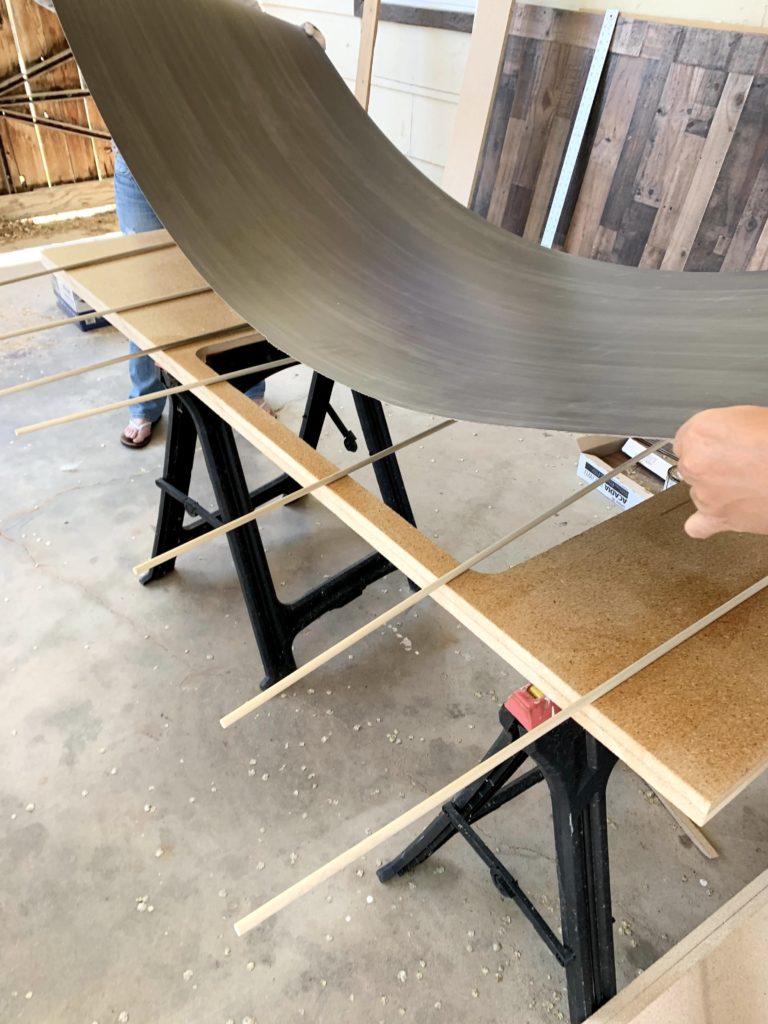
Spread a good amount of cement glue on both the MDF and the underside of your laminate piece. When working with large pieces like this, it’s important to remember that it is extremely difficult to shift the laminate once it’s made contact with the glued MDF. This is where the dowels come in handy.
Place your dowels across the countertop base (this is a photo of the sink base, because I forgot to get a picture of the other one) and lay your laminate on top making sure that there is plenty of overhand on each side. One by one remove the dowels, pressing down on the laminate as you go.
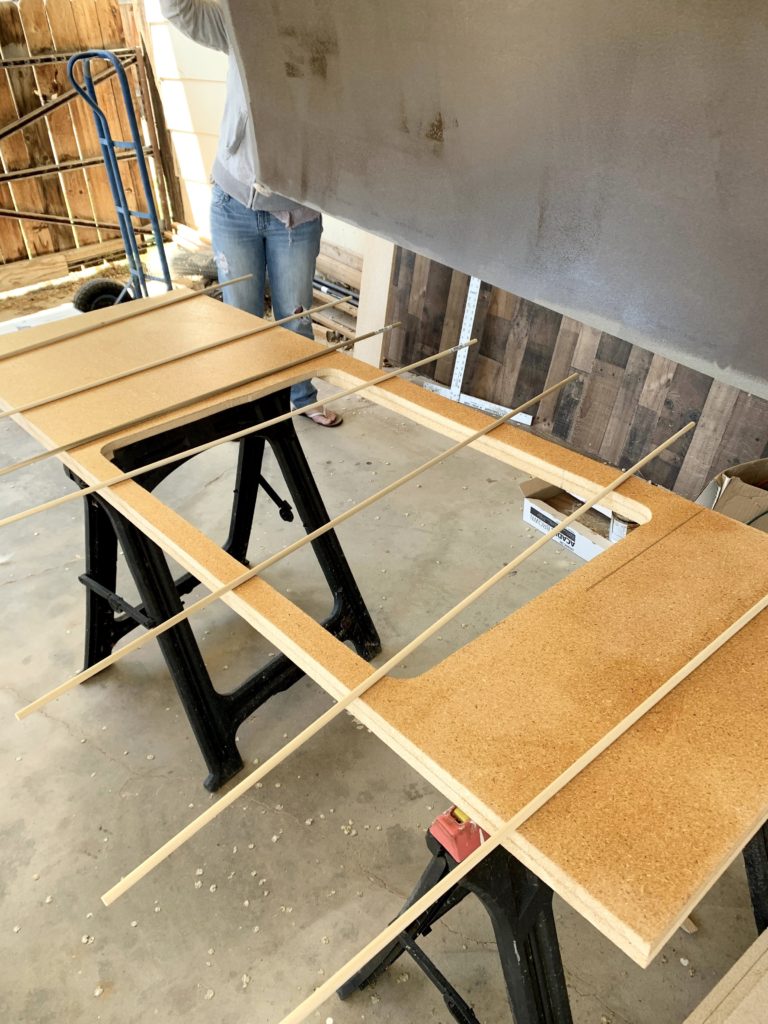
Keep an eye out for any bubbles or spots that may be raising while the glue sets. You can also use a J roller to apply pressure and make sure there is good contact.
Then, trim the excess just like you did on the edges.
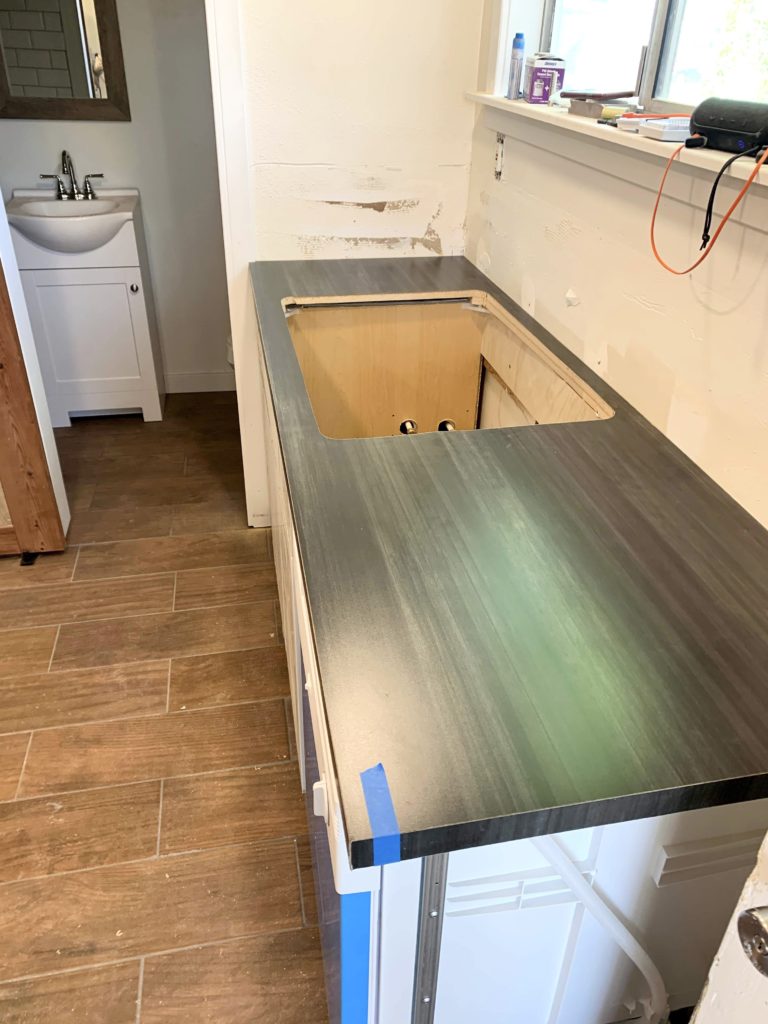
6. Put your countertop in place
Woot! This was a great feeling…just look at that DIY countertop! I’m still impressed with how these turned out. To attach the countertop, we just spread a line of liquid nails along the edge of the cabinets and set it on top.
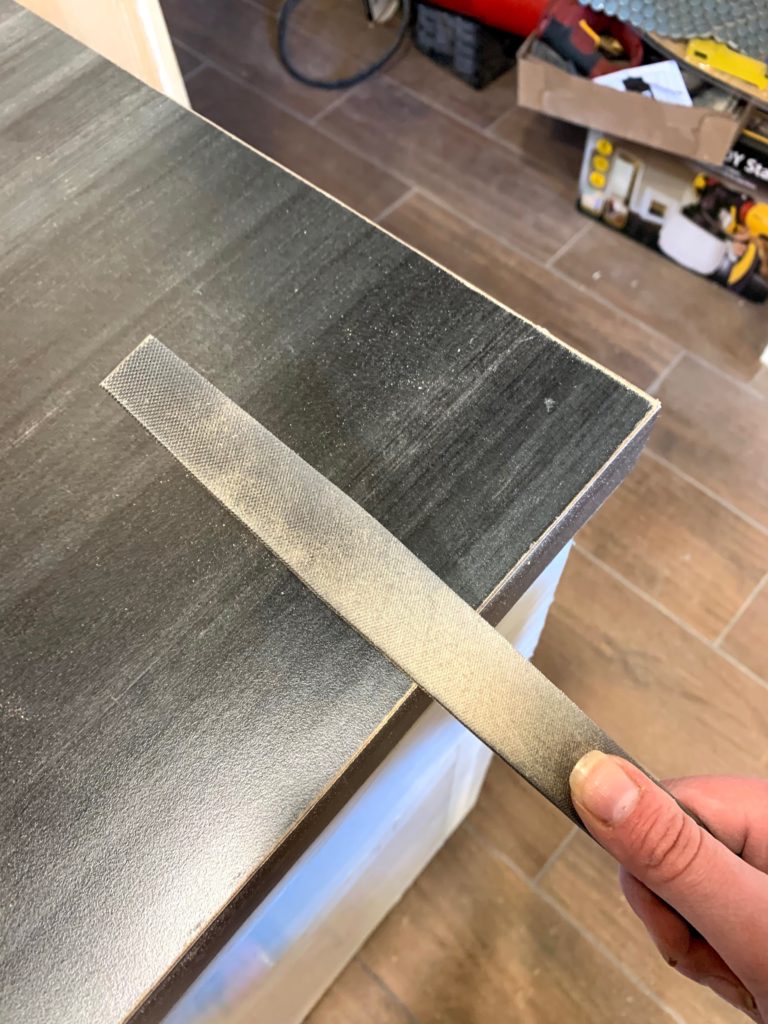
7. File your edges & repeat!
Using a metal file, sand down and smooth the edges as needed at a 45 degree angle. Don’t be too rough or you may remove more laminate than you want to, thus exposing the brown core. Yes, that’s me – 100% guilty of being too aggressive with the file.
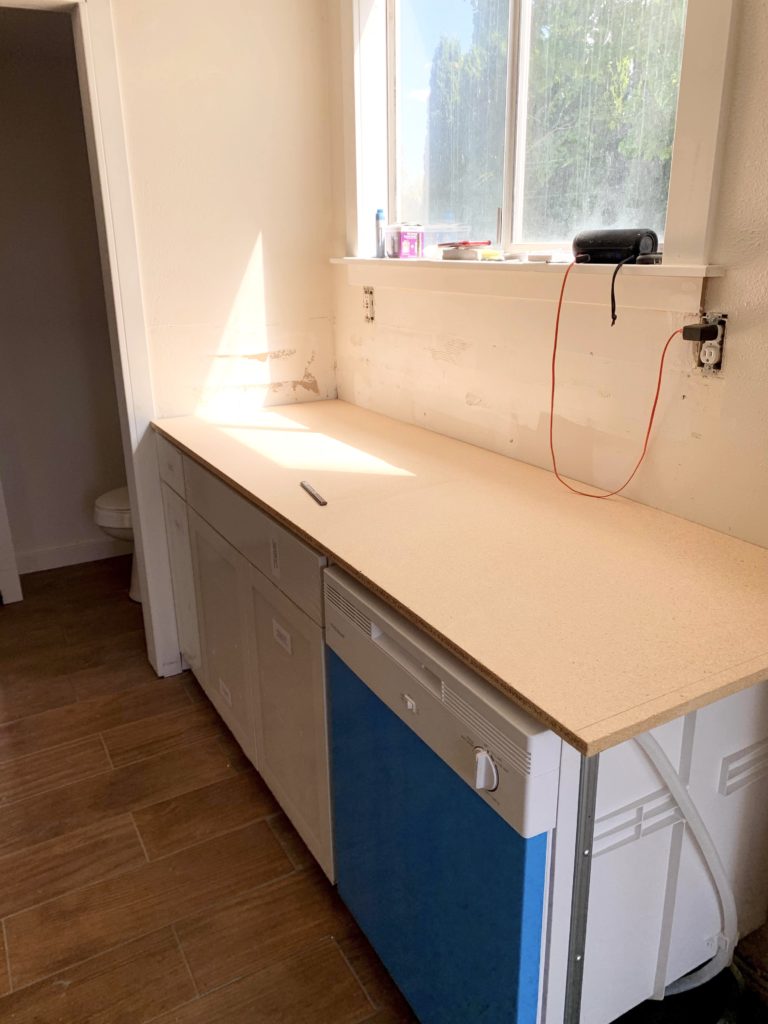
Next up is the kitchen sink countertop
1. Build your base
We followed the same process as above on this countertop; however, this time we decided to add strips to the perimeter of the bottom of the base rather than double up on the MDF.
After measuring and dry fitting – we cut, glued, and screwed the MDF strips to the bottom of our base.

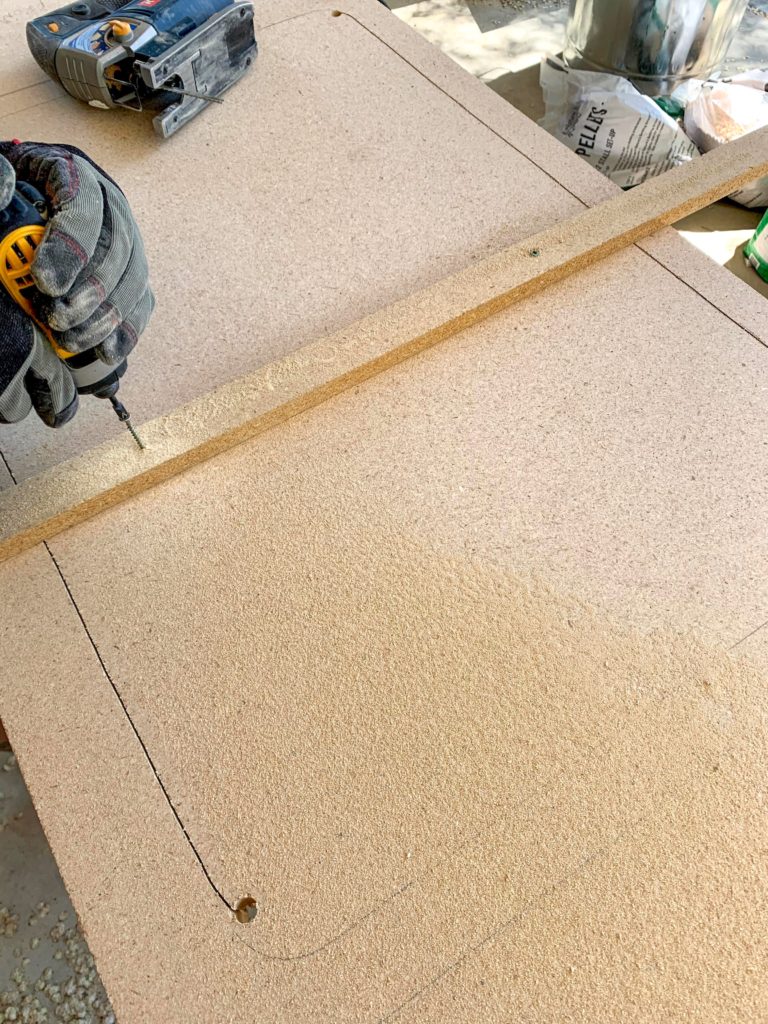
2. Trace & cut out your sink template
Using the template that came with your sink, position it on the top side of the countertop base where your sink cabinet should be and trace it. Drill starting holes for your jigsaw and start cutting out the hole.
After cutting the lengths of the sink hole, we attached a support board to catch the piece (this stuff is heavy!) so it wouldn’t fall through and potentially crack the MDF.
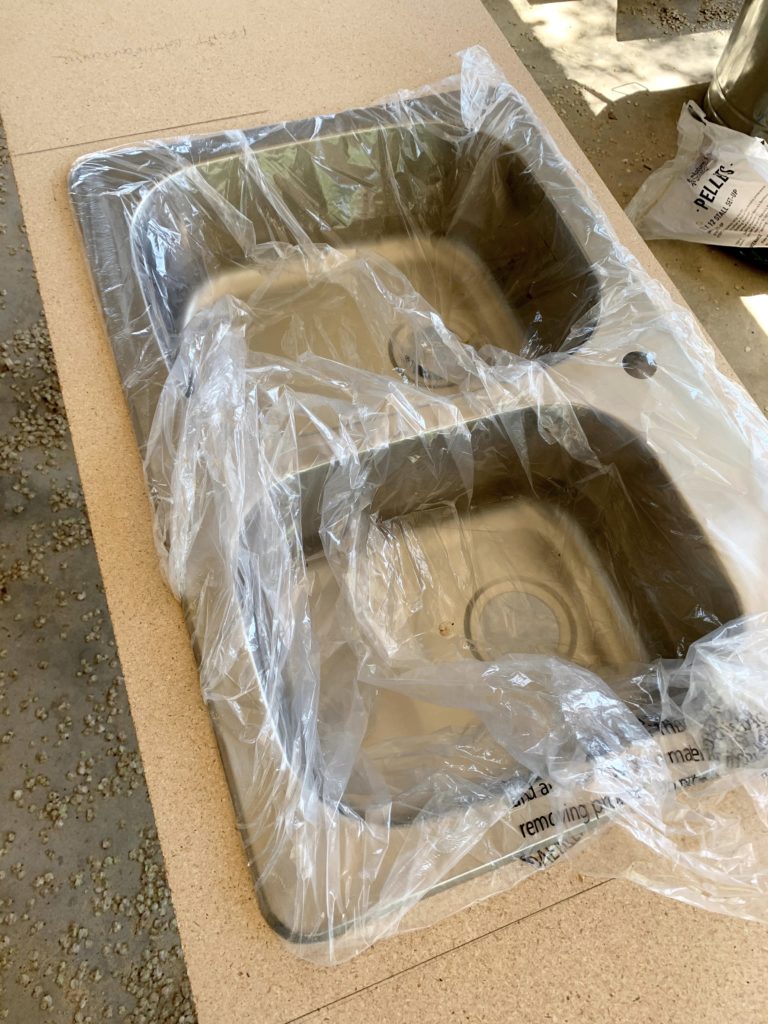
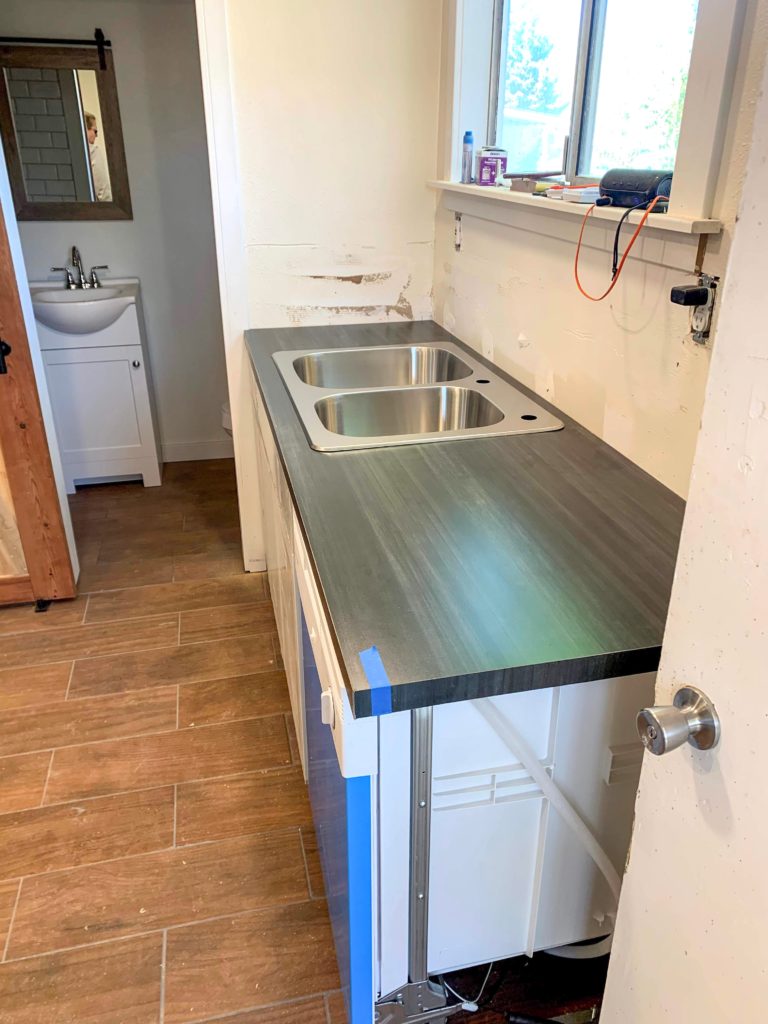
Drop your sink in and make sure it fits!
3. Glue & trim your laminate
Once your laminate top is in place, carefully make a starter hole near the edge of the sink opening with the router and continue to trim along the edge.
More trimming…
4. Put your countertop in place
5. Install your sink

6. File any rough edges & admire your work
Let them sit for at least 24-48 hours and then your countertops are ready to use!

Hopefully this post inspired you to take on your own countertops if you were on the fence 🙂 Got questions? Leave them below!